
If you need to add an interactive Google Map to your website, you need a Google Maps API key first. Without one, your map either won’t load at all or it will show up with a dark overlay and a “For development purposes only” watermark across it.
The problem is that Google’s own documentation is technical and a bit all over the place. So here’s a clean walkthrough that covers everything from start to finish. The whole process takes about 5 to 10 minutes.
I’ll walk you through creating a Google Cloud project, enabling the Maps JavaScript API, generating your API key, and locking it down so nobody else can use it.
What You Need Before You Start
You only need two things:
- A Google account (any regular Gmail works fine)
- A credit or debit card for billing setup
About the billing part: Google gives you $200 in free usage every single month. For most websites, that’s more than enough and you’ll never actually get charged. But Google still requires a billing account before any of the APIs will work. More on that in a second.
Step 1: Open the Google Cloud Console
Go to console.cloud.google.com and sign in with your Google account.
If this is your first time here, you’ll need to agree to the Terms of Service. Just accept and move on.
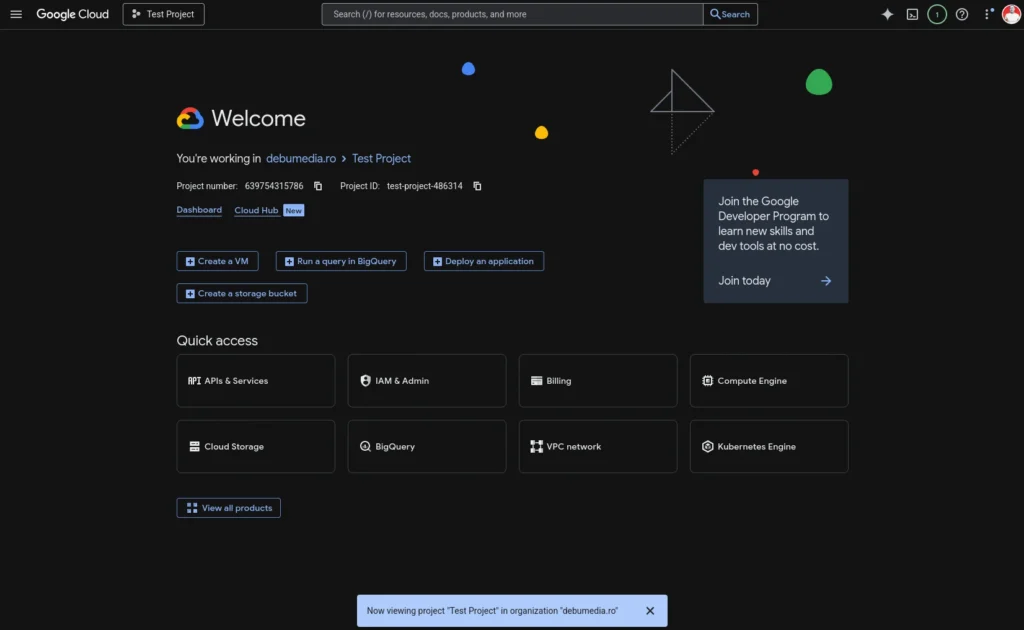
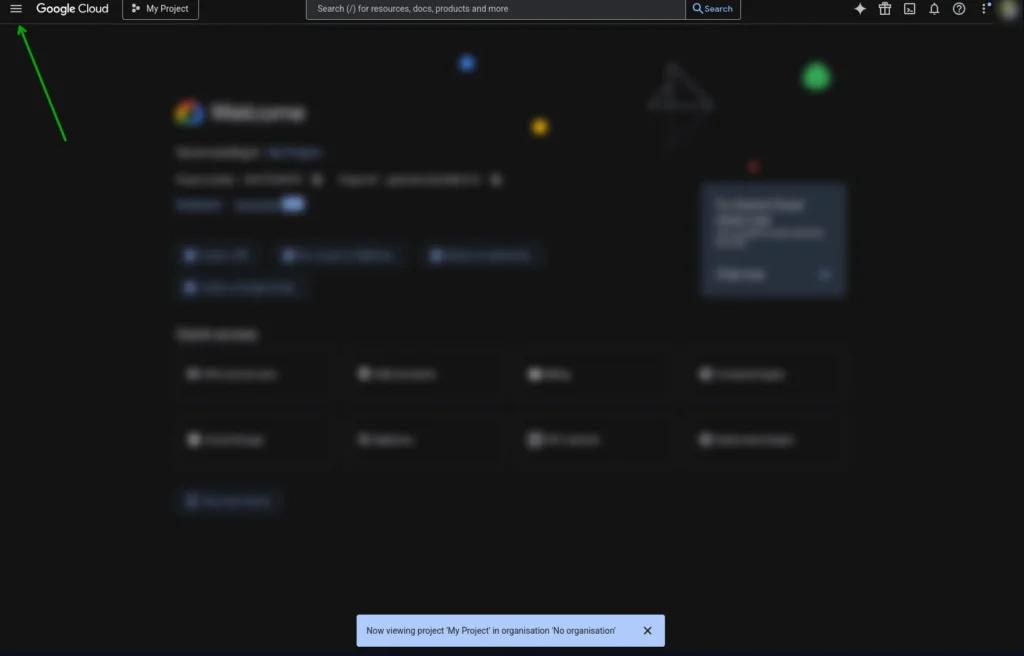
Once you’re in, you’ll see the Google Cloud dashboard. It can look a bit overwhelming with all the options, but don’t worry, you only need a few things from here.
Step 2: Create a Google Cloud Project
Every API key lives inside a project. Think of it as a folder that keeps your API keys and settings organized.
Here’s what to do:
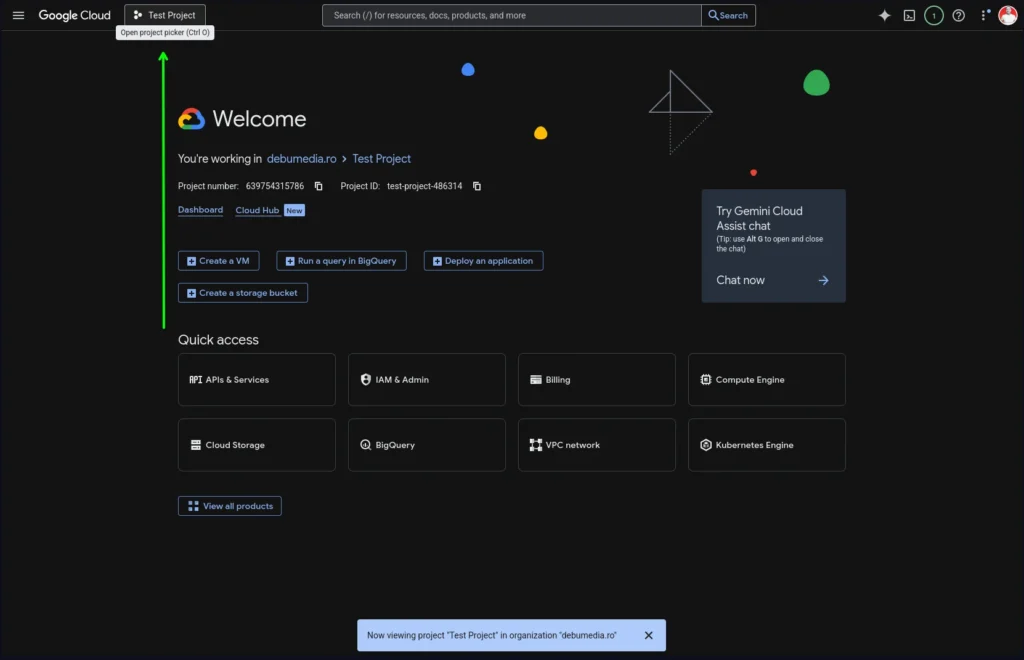
- Look at the top of the page. You’ll see a project dropdown (it either says “Select a project” or shows an existing project name). Click on it.
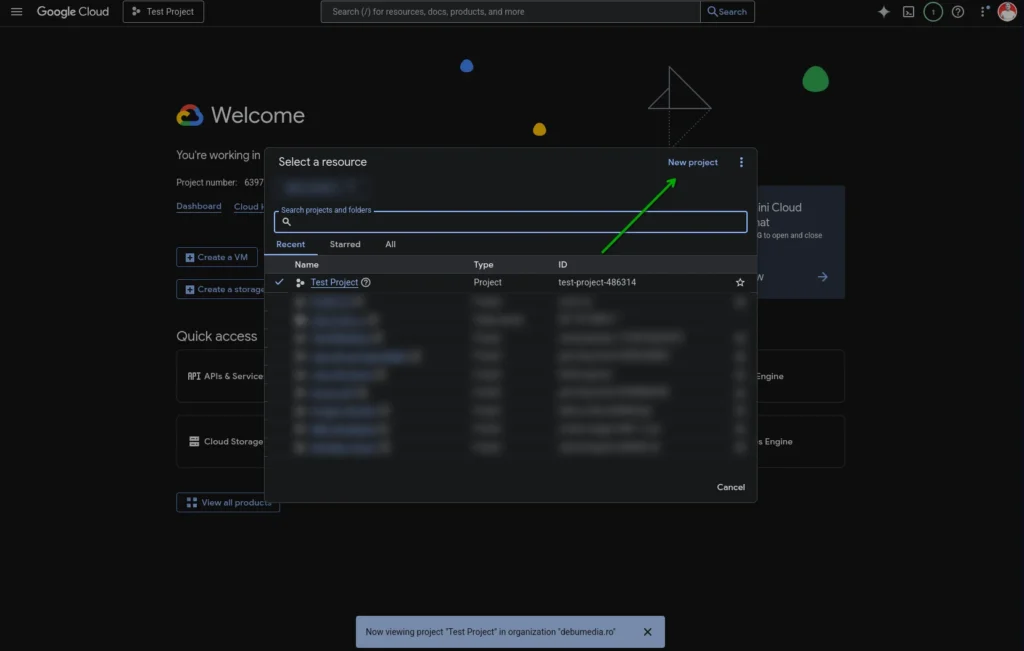
- In the popup that opens, click New Project in the top right corner.
- Give it a name that makes sense to you. Something like “My Website Maps” or your client’s business name works perfectly.
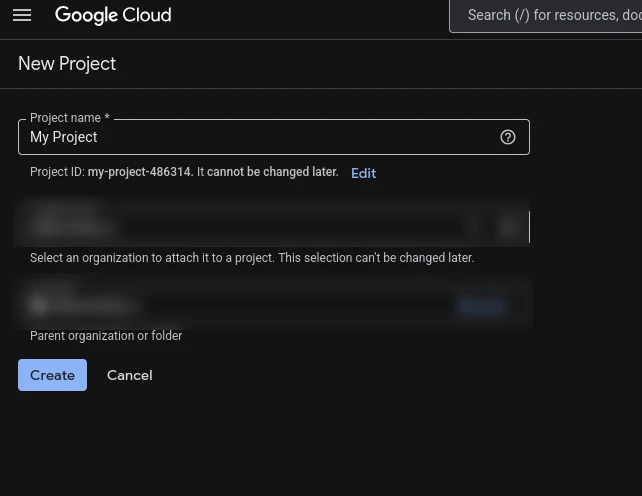
- Leave the Organization and Location fields at their defaults. You don’t need to touch those.
- Click Create.
It takes a few seconds for the project to spin up. After that, make sure your new project is selected in that dropdown at the top. If it’s not, click the dropdown again and select it.
Step 3: Set Up Billing
This is the step that trips people up, but it’s straightforward. Google requires an active billing account linked to your project before any Maps API will work.
Here’s the important thing to know: you get $200 in free Maps API usage every month. A typical small business website with an embedded map uses a tiny fraction of that. So unless you’re running thousands of map loads per day, you won’t pay anything.
To set up billing:
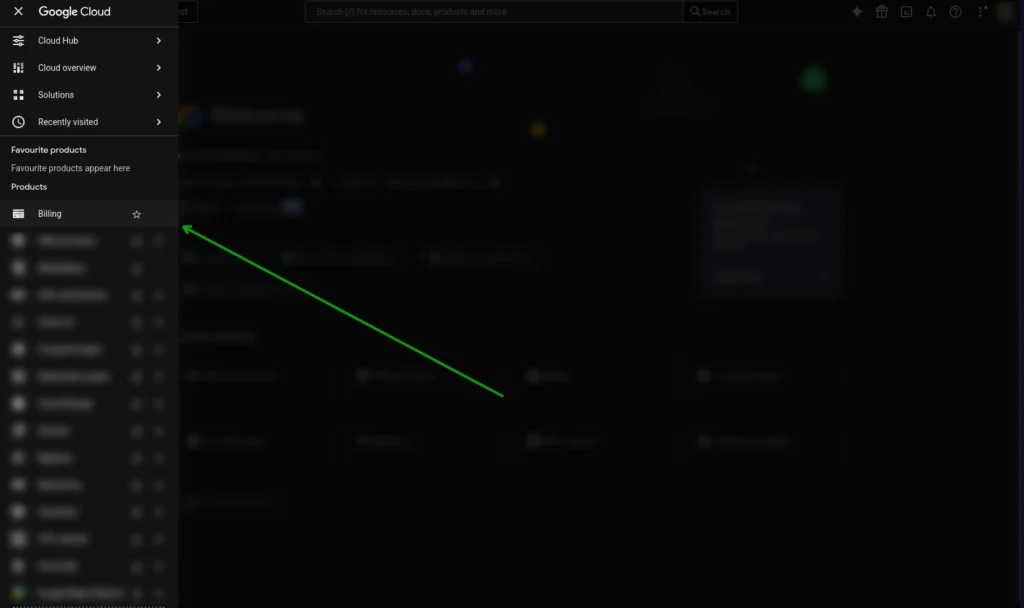
- In the left sidebar, click on Billing.
- Click Link a billing account.
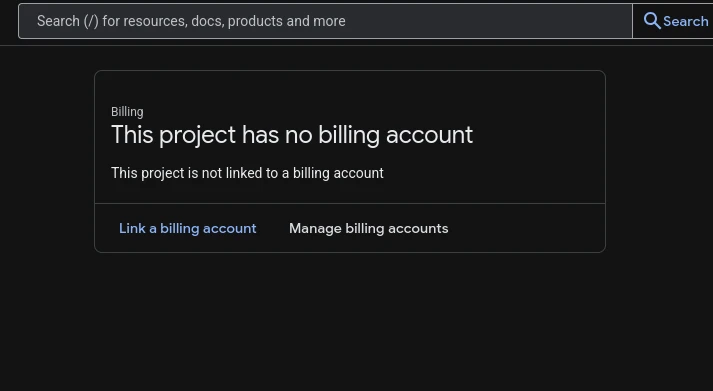
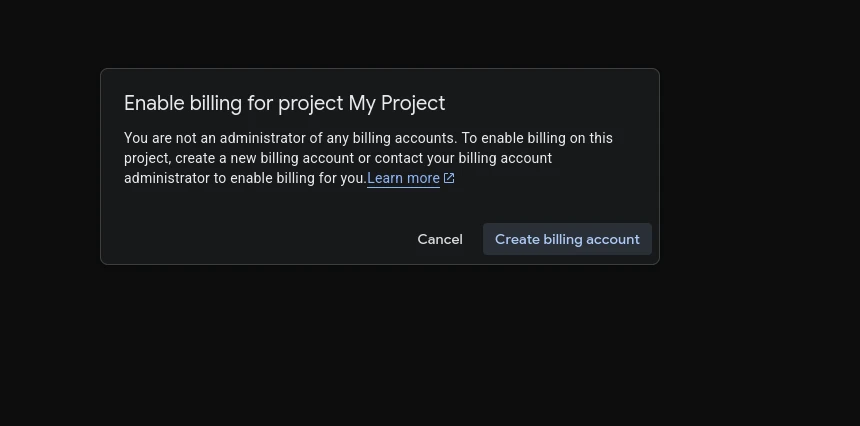
- If you don’t have a billing account yet, click Create billing account and follow the steps. You’ll need to add a payment method (credit or debit card) and your billing address.
- Once it’s set up, confirm that it’s linked to the project you just created.
If you skip this step or do it later, your maps will show up with a gray overlay and a “For development purposes only” watermark. That watermark means billing isn’t set up yet.
Step 4: Enable the Maps JavaScript API
At this point, you have two ways to get your API key. There’s a quick way that Google sometimes offers, and there’s the manual way that always works. I’ll show you both.
Option A: The Quick Way (Google Maps Platform Shortcut)
Before you go digging through menus, check if Google gives you the shortcut. In many cases it will, and it saves you a few steps.
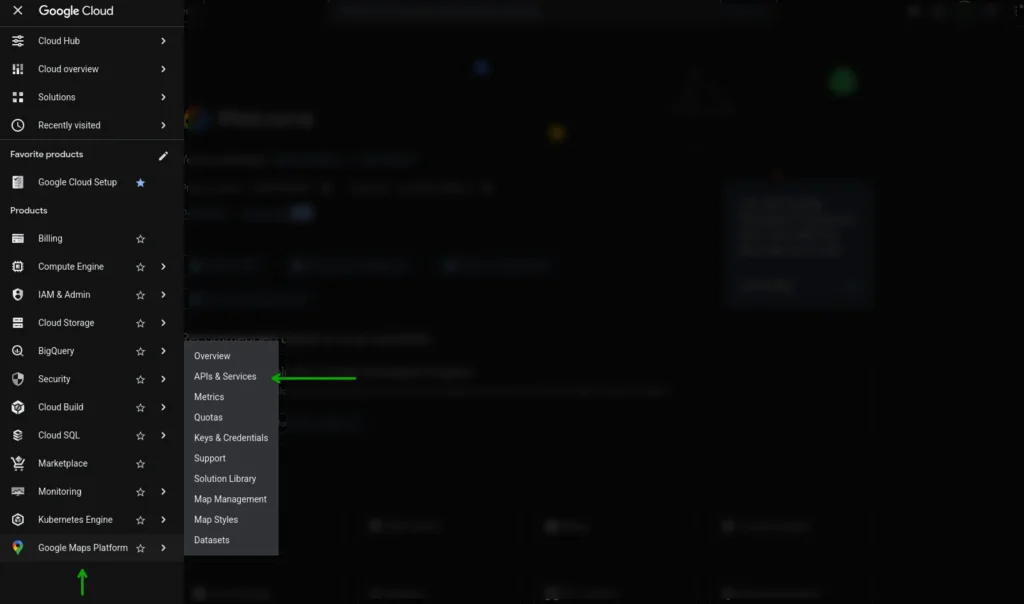
- Look at the left sidebar in the Google Cloud Console. Scroll down until you see Google Maps Platform. If it’s there, click on it.
- In the submenu that opens, click APIs & Services.
- If this is your first time setting up Maps on this project, Google will show you a “Get Started on Google Maps Platform” screen. It will display your API key right there, along with a checkbox that says Enable all Google Maps APIs for this project.
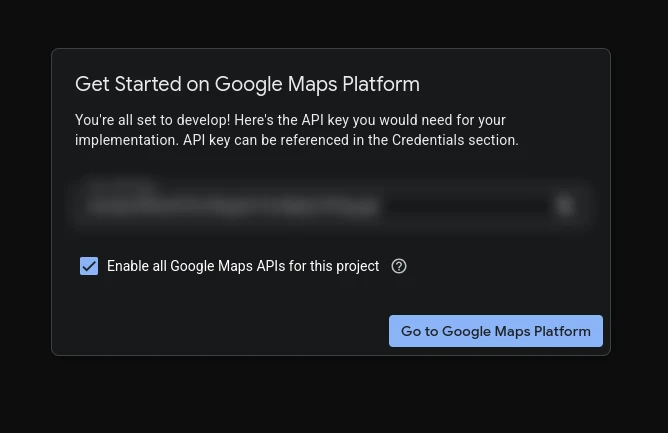
- Leave that checkbox checked if you want all Maps APIs enabled (this is fine for most websites). Or uncheck it if you only want specific ones.
- Copy your API key and save it somewhere safe.
- Click Go to Google Maps Platform.
That’s it. You now have a working API key with the Maps APIs enabled. Skip ahead to Step 5: Restrict Your API Key below, because that part is still critical.
If you don’t see “Google Maps Platform” in the sidebar, or the wizard doesn’t appear, no problem. Just follow Option B.
Option B: The Manual Way (Always Works)
This is the standard path that works regardless of what your console looks like.
First, you need to get to APIs & Services. There are two easy ways:
- From the dashboard: When you land on the Google Cloud Console dashboard after creating your project, you’ll see a “Quick access” section. Click APIs & Services right there.

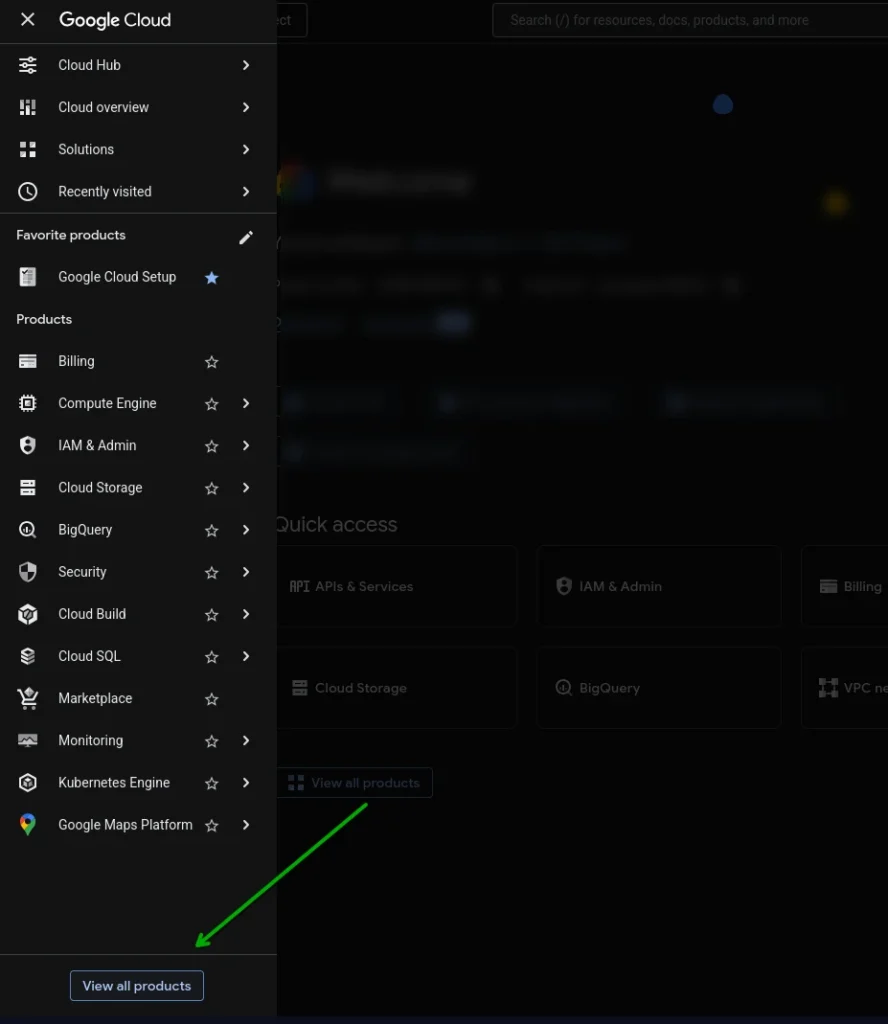
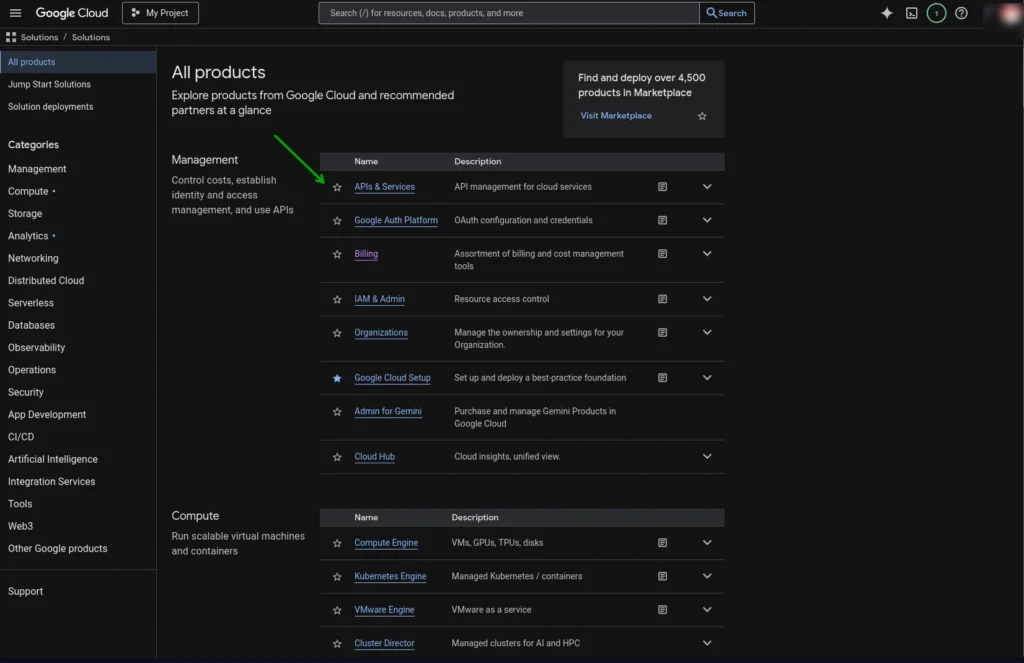
- From the sidebar: Click the hamburger menu (three lines) at the top left to open the sidebar. Scroll all the way down and click View all products. On the All products page, you’ll see APIs & Services listed under Management. Click on it.
Now, enable the Maps JavaScript API:
- Once you’re in APIs & Services, click Library in the left menu.
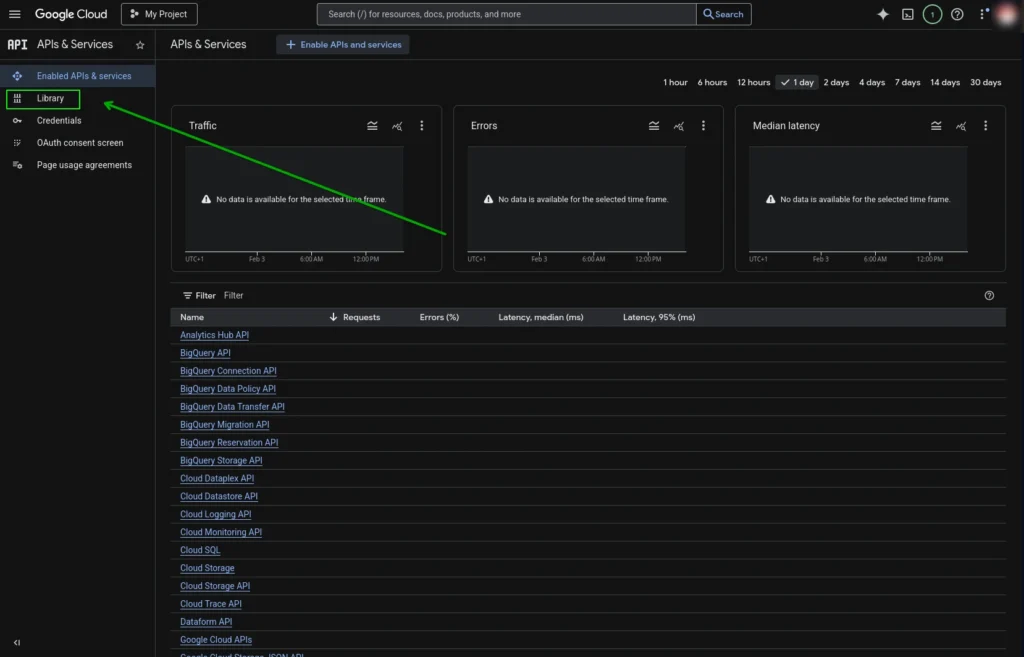
- In the search bar, type Maps JavaScript API.
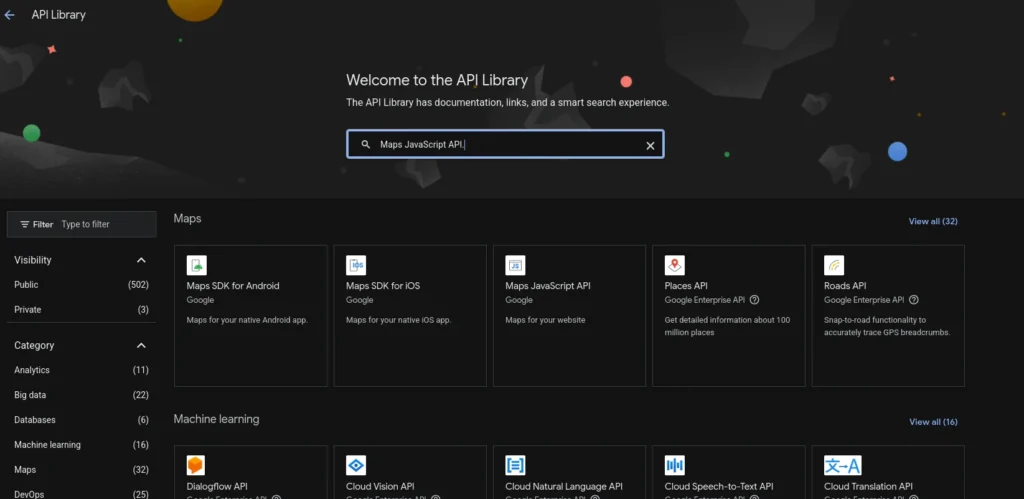
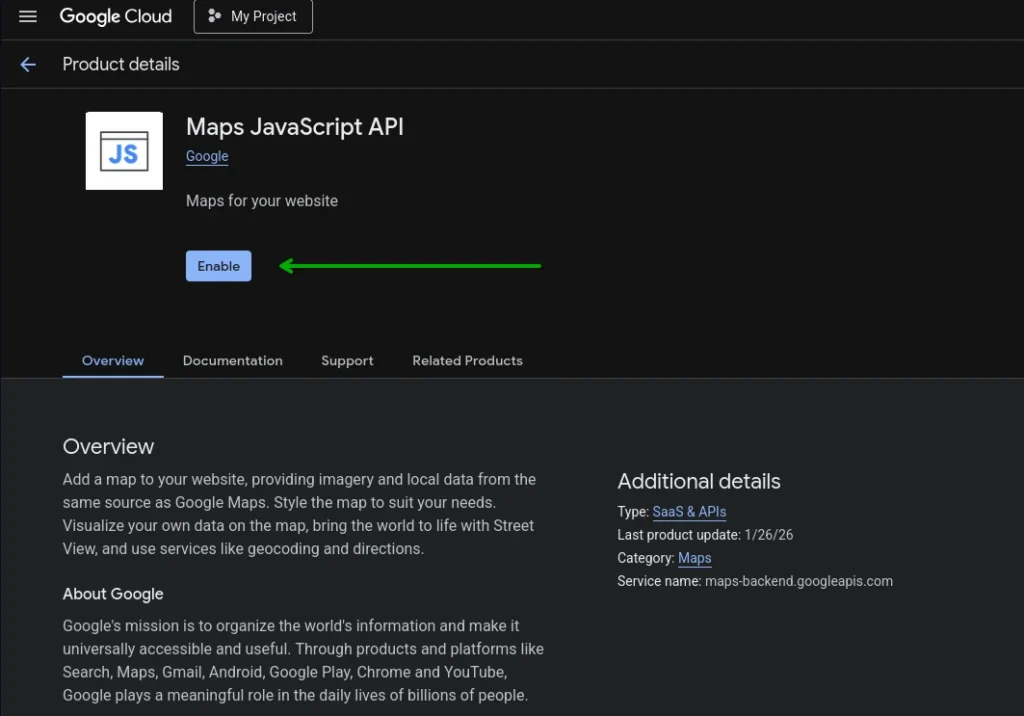
- Click on it from the results.
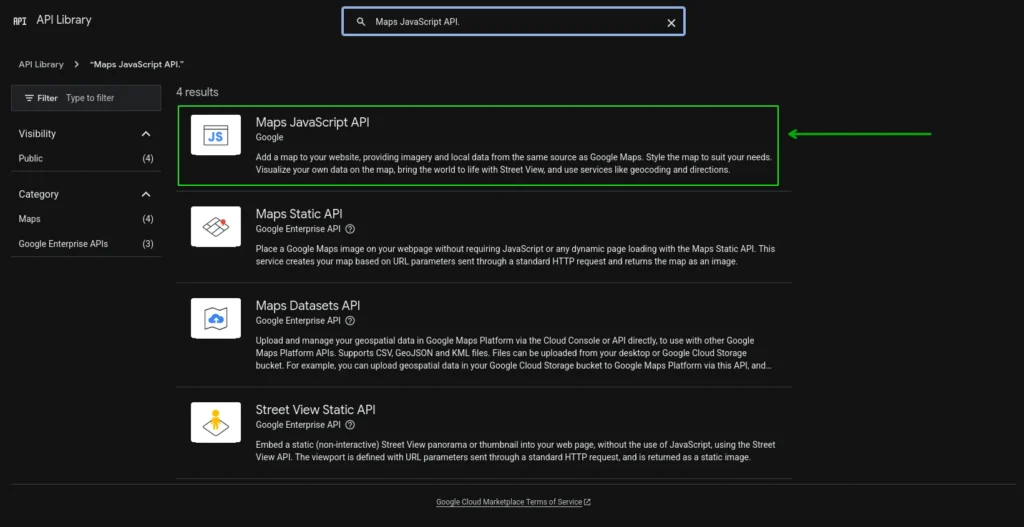
- Click the blue Enable button.
If you’re in Europe (or the European Economic Area), Google will show a popup asking you to accept the EEA Terms of Service. You’ll need to type Confirm in the text field and click Accept & continue. This is a one-time thing. If you don’t see this popup, you’re good, just move on.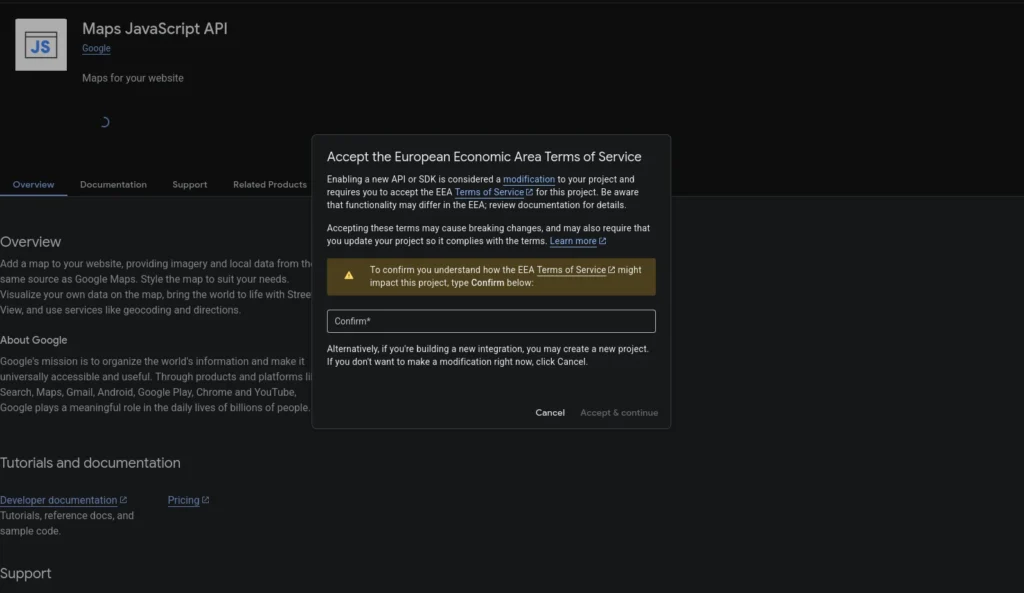
Note: For the next step, if you used Option A earlier and left the “Enable all Google Maps APIs for this project” checkbox checked, all of these are already enabled and you can skip ahead to creating your API key below.
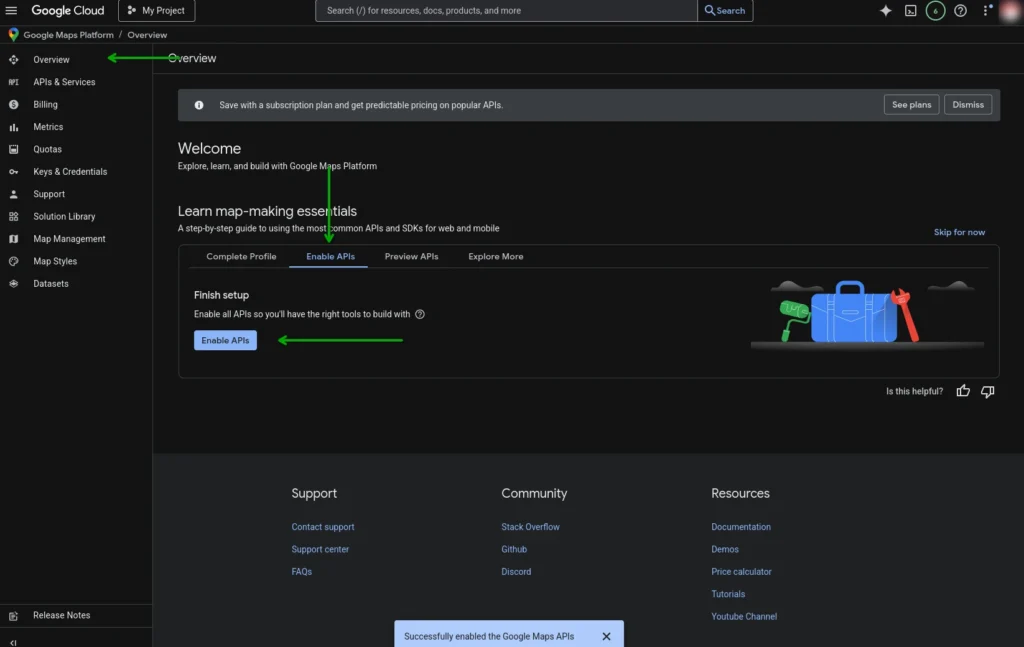
After accepting, you’ll most likely land on the Google Maps Platform Overview page. You’ll see a “Learn map-making essentials” section with an Enable APIs tab. Click the blue Enable APIs button there and it will enable all the Google Maps APIs at once. You’ll see a confirmation message at the bottom saying “Successfully enabled the Google Maps APIs.”
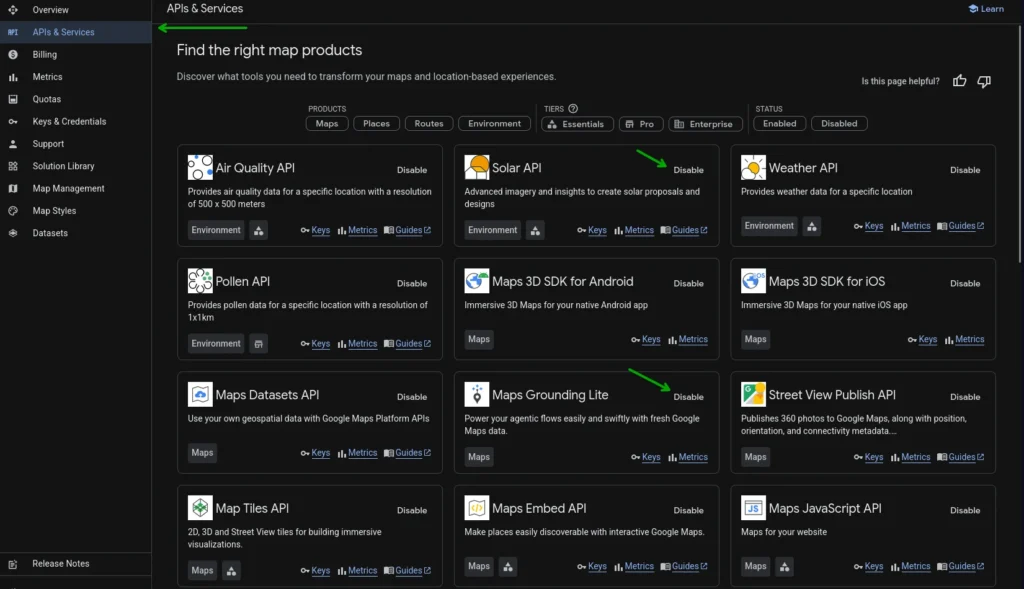
If you want more control over which APIs to enable, click APIs & Services in the left sidebar instead. This page lists every available map API individually, and you can click Enable next to only the ones you need.
Here are the most common ones:
- Maps Embed API if you’re using simple iframe embeds
- Places API if you need autocomplete or place details
- Geocoding API if you need to convert addresses into map coordinates
- Directions API if you’re showing routes between locations
Only turn on what you actually need. Each one counts toward your usage quota separately.
Then, create your API key:
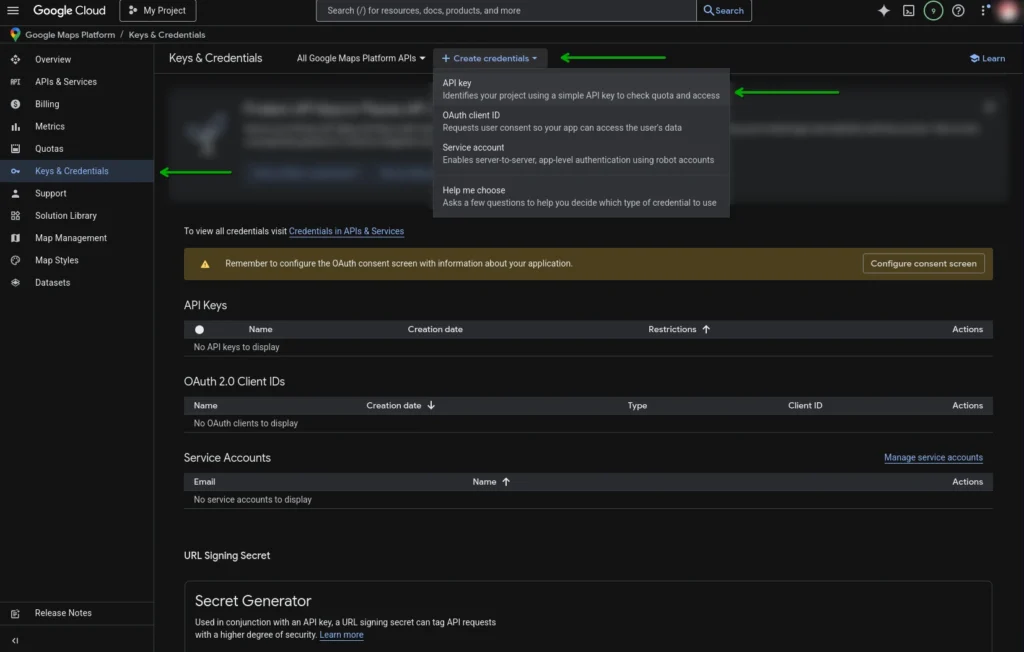
- Still inside APIs & Services, click Keys & Credentials in the left menu.
- At the top of the page, click + Create Credentials.
- From the dropdown, choose API key.
- A popup will appear with your brand new API key. Copy it and save it somewhere safe, like a text file or a password manager.
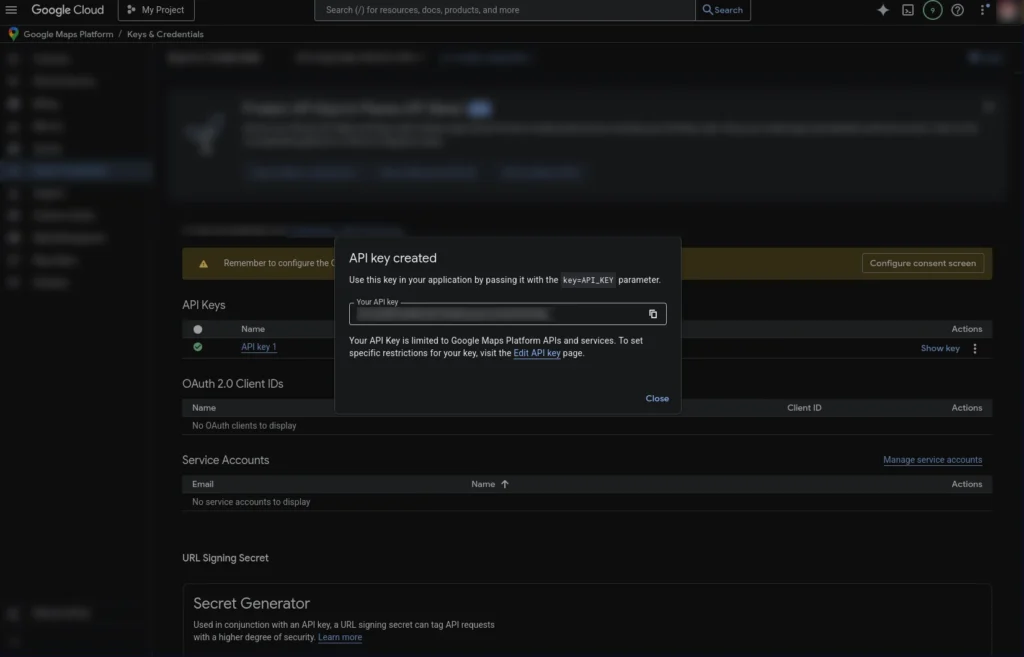
At this point your key works, but it’s completely unrestricted. That means anyone who finds it could use it and rack up charges on your account. So the next step is important.
Step 5: Restrict Your API Key
This is the most important security step and the one that most guides either skip or rush through. An unrestricted API key is like leaving your front door wide open.
Since your key will be visible in your website’s source code (anyone can view it with browser developer tools), you need to lock it down so that only your website can use it.
Here’s how:
- If you used Option A above, click on Keys & Credentials in the Google Maps Platform sidebar. Then click on the name of your API key to edit it.
- If you used Option B, you should already be on the Credentials page. Click on the name of the API key you just created.
- Under Application restrictions, select Websites.
- Under Website restrictions, click Add.
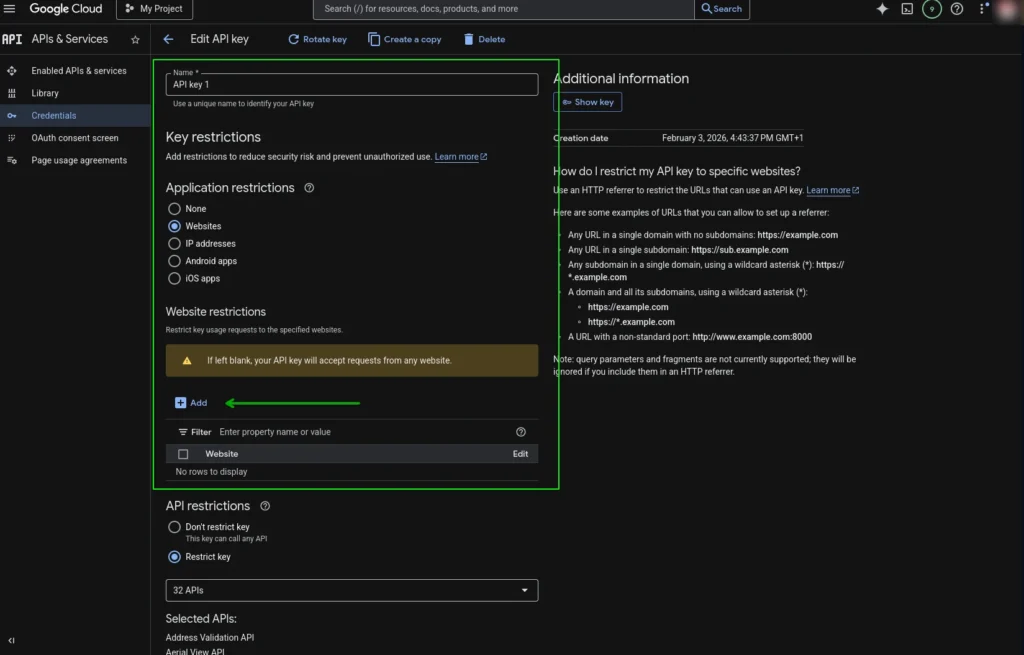
- Add your website domains in this format:
https://yourdomain.com/*https://www.yourdomain.com/*- If you have a staging or development site, add that too:
https://staging.yourdomain.com/* - For local testing, you can temporarily add
http://localhost/*(but remove this before going live)
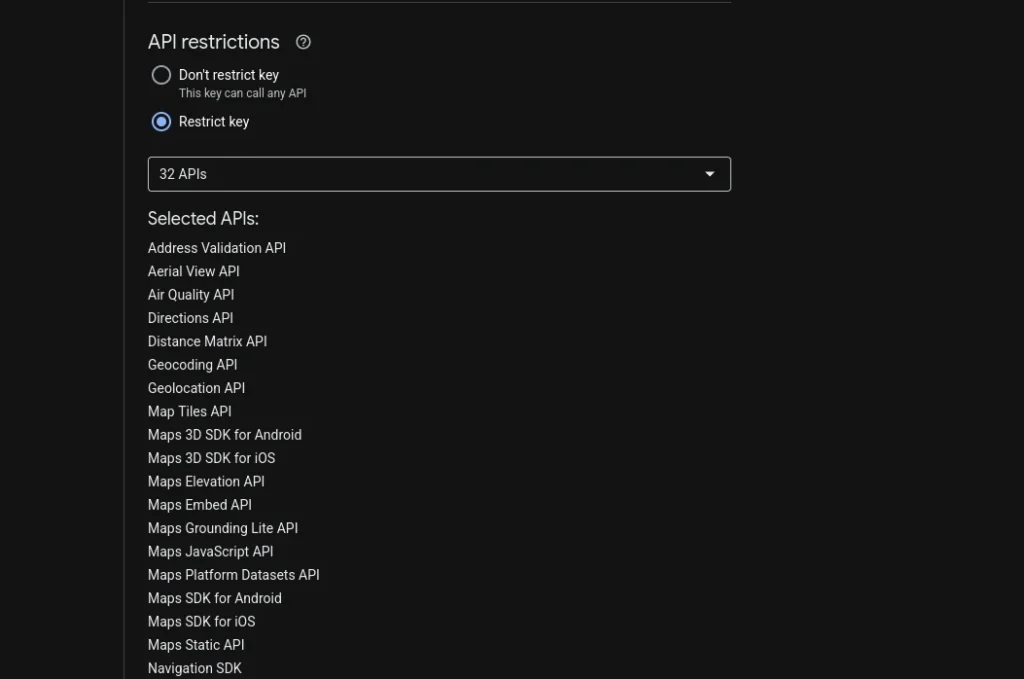
- Scroll down to API restrictions. Select Restrict key.
- In the dropdown, check only the APIs you enabled in Step 4 (for example, Maps JavaScript API). They should already be selected by default, but if they aren’t click the dropdown and select them manually.
- Scroll down and click Save.
It can take up to 5 minutes for the restrictions to kick in. During that time, the key still works but the restrictions aren’t enforced yet.
One more thing: if your map suddenly stops working after adding restrictions, double-check that you typed the domain correctly. A missing https:// or a typo in the domain name is usually the cause. You can temporarily remove restrictions to confirm that’s the issue, then re-add them carefully.
Troubleshooting Common Issues
If your map isn’t showing up or something looks off, here’s what to check:
The map shows a “For development purposes only” watermark: This means billing isn’t set up or isn’t linked to your project. Go back to Step 3 and make sure everything is connected.
The map doesn’t load at all (blank space): Open your browser’s developer tools (right-click > Inspect > Console tab) and look for error messages. The most common causes are:
- API key is missing, misspelled, or pasted incorrectly
- The Maps JavaScript API isn’t enabled (Step 4)
- Your domain isn’t added to the key’s website restrictions (Step 5)
“This page can’t load Google Maps correctly” popup: Almost always a billing issue. Verify that your billing account is active and linked to the right project.
Map works locally but not on the live site: You probably added localhost to the restrictions but forgot to add your actual domain. Go back to Credentials, edit the key, and add your live domain.
Map works on the live site but not on staging: Same thing in reverse. Add your staging domain to the key restrictions.
How to Set a Budget (So You Never Get Charged)
If you want extra peace of mind, you can set a billing budget so Google alerts you (or stops serving maps) if usage goes beyond a certain amount.
- Go to Billing > Budgets & alerts.
- Click Create Budget.
- Name it something like “Maps Budget.”
- Set the amount. You can set this to $1 or even $0 if you want. If your free $200 monthly credit covers your usage (which it almost certainly will), you’ll never hit this budget anyway.
- Configure alert thresholds and save.
This way, even in a worst-case scenario, you control exactly how much you’re willing to spend.
Quick Recap
Here’s the full process at a glance:
- Go to console.cloud.google.com and sign in
- Create a new Google Cloud project
- Set up and link a billing account
- Enable the Maps APIs and create your API key (either through the Google Maps Platform shortcut or manually through the API Library)
- Restrict the key to your website’s domain and the specific APIs you’re using
That’s everything. Once it’s set up, you generally don’t need to touch it again unless you change domains or need additional APIs.
Frequently Asked Questions
Is it free to get a Google Maps API key?
Creating the key itself is free. Google gives you $200 in free usage credit every month, which resets automatically. For most websites that just display a map on a contact page or a few location pages, this free tier is more than enough and you’ll never see a charge.
Can I use Google Maps without an API key?
Not really. Google requires an API key for all Maps JavaScript API usage. Without one, your map will either not load or show a watermark. The only exception is basic Google Maps Embed links using an iframe, but even those now require a key for reliable usage.
How long does it take for the API key to start working?
The key works immediately after creation. If you’ve added restrictions (which you should), those can take up to 5 minutes to fully take effect.
What happens if I exceed the $200 free credit?
You’ll start getting billed based on Google’s pay-as-you-go pricing. But for context, the $200 credit covers roughly 28,000 dynamic map loads per month. Most small and medium websites don’t come anywhere close to that.
Can someone steal my API key from my website’s source code?
They can see it, yes. That’s exactly why you restrict the key in Step 5. With proper website restrictions, even if someone copies your key, it won’t work on any domain other than yours.
Do I need a different key for each website?
You don’t have to, but it’s a good practice. Using separate keys for separate websites gives you cleaner usage tracking and means that if one key gets compromised, it doesn’t affect your other sites. You can create multiple keys within the same project, or create separate projects for each client.